Part 1: Introduction to Baked Chicken Cutlets
When you’re in the mood for a satisfying yet healthy meal, baked chicken cutlets offer a fantastic solution. These tender, crispy chicken pieces are the perfect choice for busy weeknights or meal prep. Unlike their fried counterparts, baked chicken cutlets are low in fat and offer all the lean protein you need without compromising on flavor. They’re also versatile, easy to make, and can be paired with virtually any side dish. Whether you’re craving something simple or you’re looking to experiment with new seasonings, baked chicken cutlets can easily become your go-to recipe for a quick, healthy dinner.
In this guide, we’ll walk you through everything you need to know about baked chicken cutlets. From understanding what they are, to learning how to make them, and exploring different flavor variations, you’ll be ready to serve this dish in no time. Let’s dive in!
1.1 What Are Baked Chicken Cutlets?
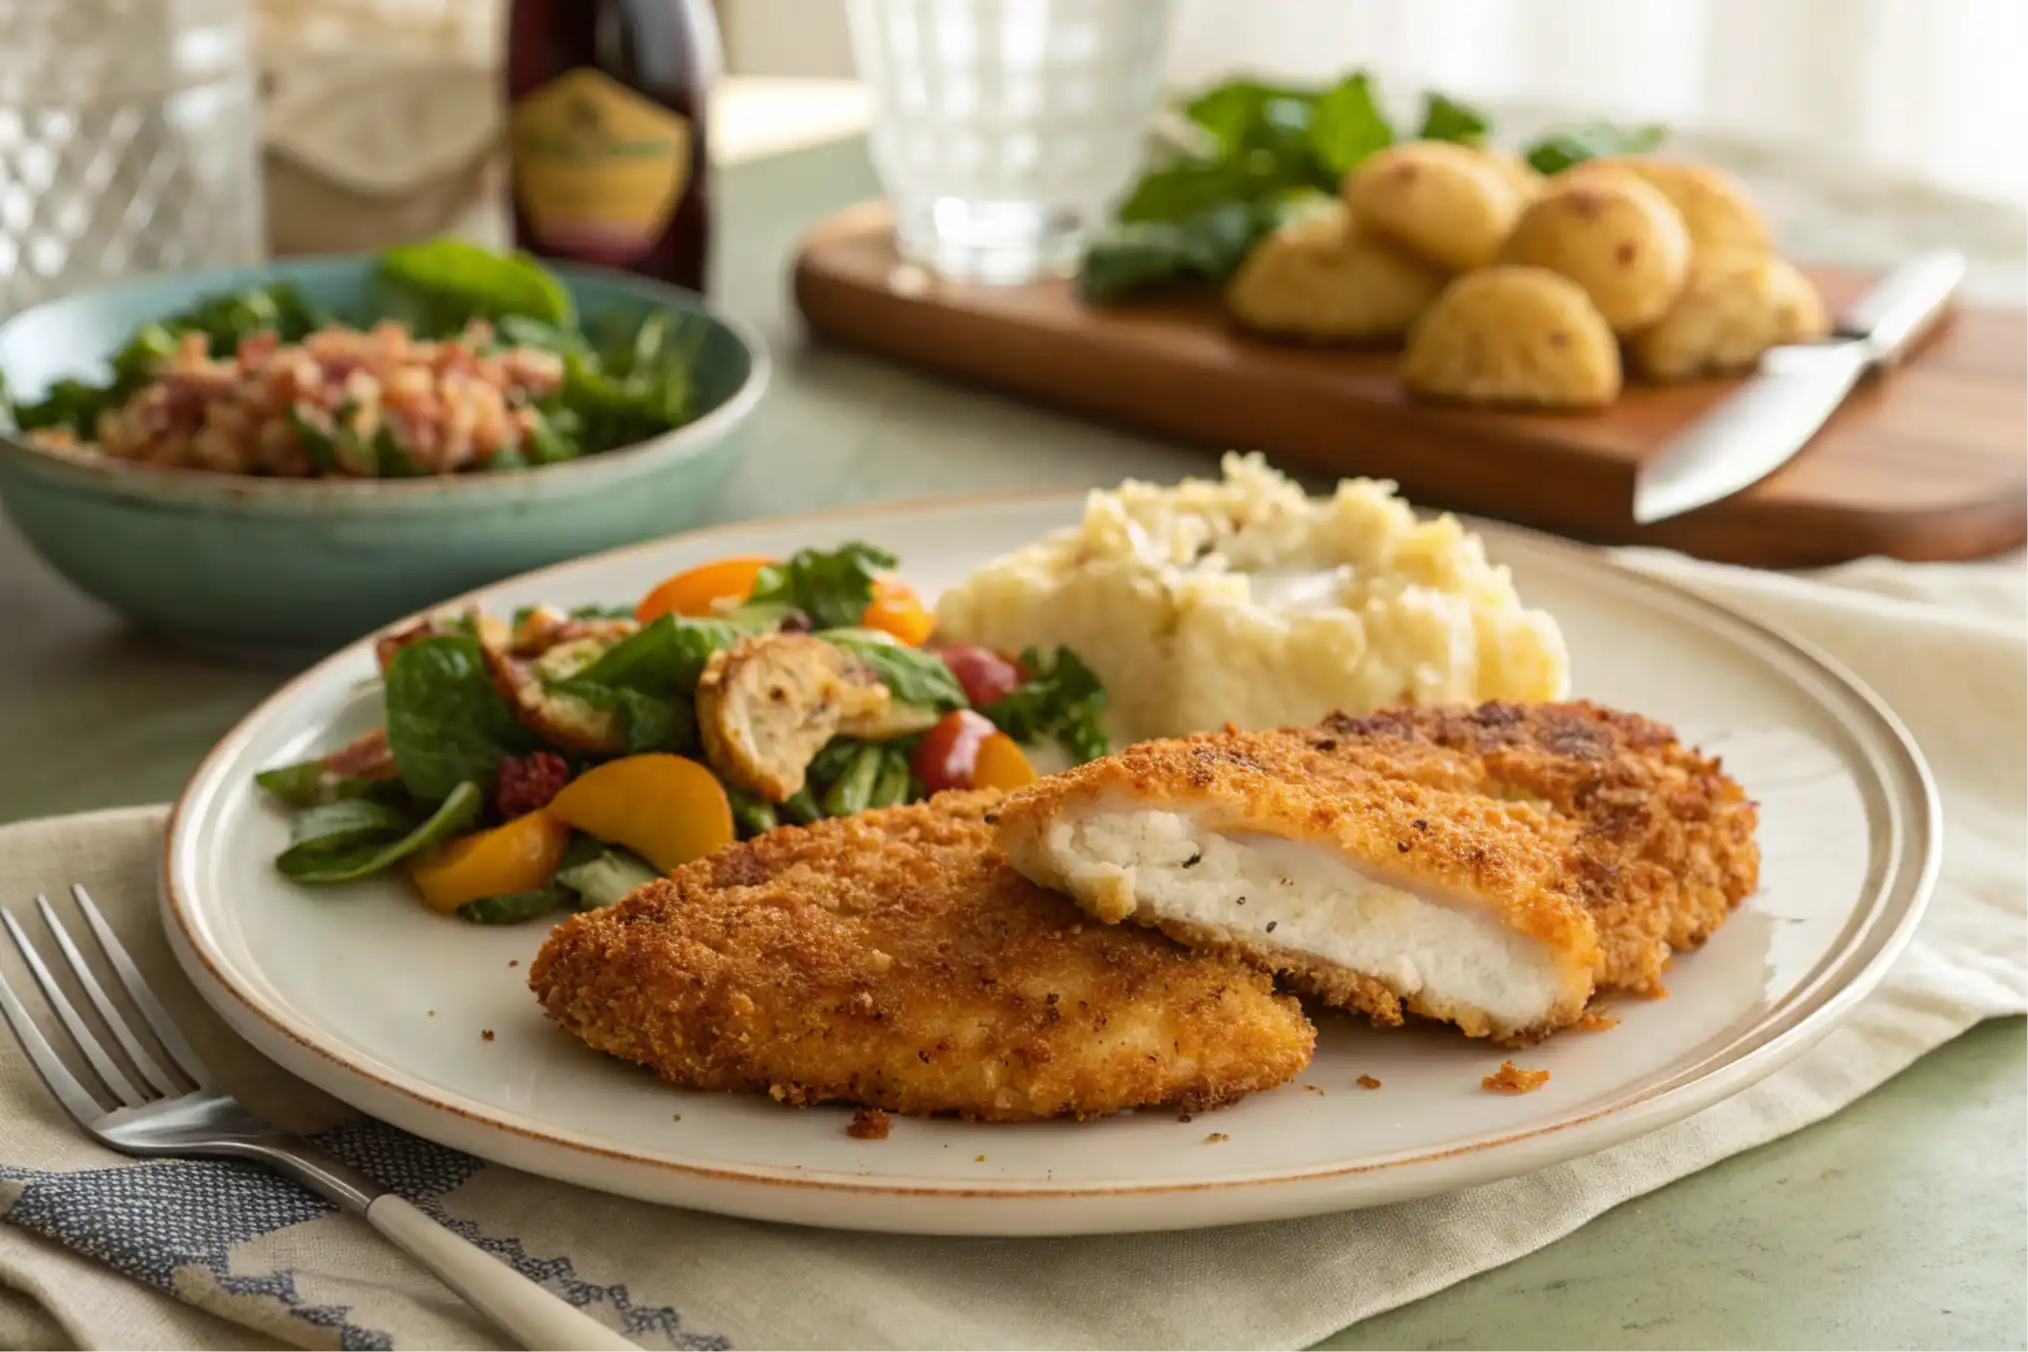
Baked chicken cutlets are thin slices of chicken, often made from chicken breasts or thighs, that are breaded and then baked in the oven rather than fried. They are a healthier alternative to fried chicken because they are significantly lower in fat while still maintaining that crispy, golden-brown texture that everyone loves. The word “cutlet” refers to the thinly sliced pieces of meat, which cook quickly and evenly, resulting in a juicy interior and a crispy exterior.
Unlike fried cutlets, which soak up oil, baked chicken cutlets offer a guilt-free way to enjoy crispy chicken. Whether you coat them in breadcrumbs, panko, or even crushed nuts, the baking process allows you to enjoy the flavor without the extra calories. This makes them an excellent choice for anyone looking to eat healthier, whether you’re watching your weight or just trying to avoid too much oil.
1.2 Why Choose Baked Chicken Cutlets?
So, why should you choose baked chicken cutlets over other chicken dishes? There are plenty of reasons! Let’s explore some of the key benefits:
Healthier Option
One of the primary reasons baked chicken cutlets are so popular is their health benefits. By baking the chicken instead of frying it, you can cut down on excess oils and unhealthy fats. Chicken breasts, in particular, are a great source of lean protein, and baking them preserves their nutritional value. For those following low-fat, low-carb, or keto diets, baked chicken cutlets are an excellent fit.
Versatile and Flavorful
Another reason to love baked chicken cutlets is their versatility. You can easily adjust the seasoning to match whatever flavor profile you’re in the mood for. From zesty lemon and herbs to smoky paprika or even Parmesan cheese, the possibilities are endless. You can even customize the breading for different textures or use a gluten-free alternative to cater to dietary restrictions.
Quick and Easy to Prepare
If you’re short on time, baked chicken cutlets are an absolute lifesaver. They’re easy to prepare and cook, making them perfect for busy weeknights. With just a few simple ingredients and around 20 minutes in the oven, you can have a flavorful meal ready to go. Plus, they’re perfect for meal prepping—cook a batch on Sunday, and you’ll have dinner sorted for the entire week.
Kid-Friendly
One of the best things about baked chicken cutlets is that they’re a hit with kids! The crispy exterior and tender chicken inside are perfect for little hands, and you can even sneak in healthy breadcrumbs or add some veggies to the mix for extra nutrition. Whether you’re serving them with a side of mashed potatoes or a fresh salad, these cutlets will keep everyone at the table happy.
Part 2: How to Make Baked Chicken Cutlets

Now that you’re excited about making baked chicken cutlets, let’s dive into the actual process. First, preparing these delicious, crispy cutlets is easier than you might think. In fact, the results are absolutely worth it. Whether you’re a seasoned cook or a beginner in the kitchen, this step-by-step guide will walk you through everything you need to know. Moreover, with a few simple ingredients and a little bit of time, you’ll have a meal that’s both satisfying and full of flavor. So, let’s get started!
2.1 Ingredients Needed
Before you get started, gather all the ingredients you’ll need. The best part about baked chicken cutlets is that you likely already have most of these items in your pantry and fridge.
Basic Ingredients:
- Chicken breasts or thighs: Boneless, skinless chicken breasts work best for a lean, protein-packed meal. You can also use thighs for a juicier option, though they’ll take slightly longer to cook.
- Breadcrumbs: Use regular breadcrumbs for a traditional texture, or try panko breadcrumbs for extra crunch. For a gluten-free option, almond meal or gluten-free breadcrumbs are great alternatives.
- Eggs: Eggs are used to help the breadcrumbs stick to the chicken. They also add a rich texture to the cutlet.
- Seasonings: Salt, pepper, garlic powder, and onion powder are the basic seasonings for flavor. You can also add herbs like oregano, thyme, or rosemary for extra aroma.
Optional Ingredients:
- Parmesan cheese: A sprinkle of Parmesan mixed with the breadcrumbs adds an extra layer of flavor and richness to the cutlets.
- Olive oil or butter: A light drizzle of olive oil or a pat of butter before baking helps to crisp up the chicken cutlets.
- Herbs: Fresh parsley or basil can be chopped and added for freshness, either in the breading mix or as a garnish after baking.
2.2 Step-by-Step Guide to Baking Chicken Cutlets
Let’s walk through the process of making baked chicken cutlets step by step. It’s surprisingly simple, and you’ll have crispy, golden cutlets ready in no time!
Step 1: Prepare the Chicken
Start by trimming any excess fat from the chicken breasts or thighs. If you’re using chicken breasts, you may want to slice them horizontally to create thinner pieces (or use a meat mallet to pound them out evenly). The thinner the cutlet, the faster and more evenly it will cook.
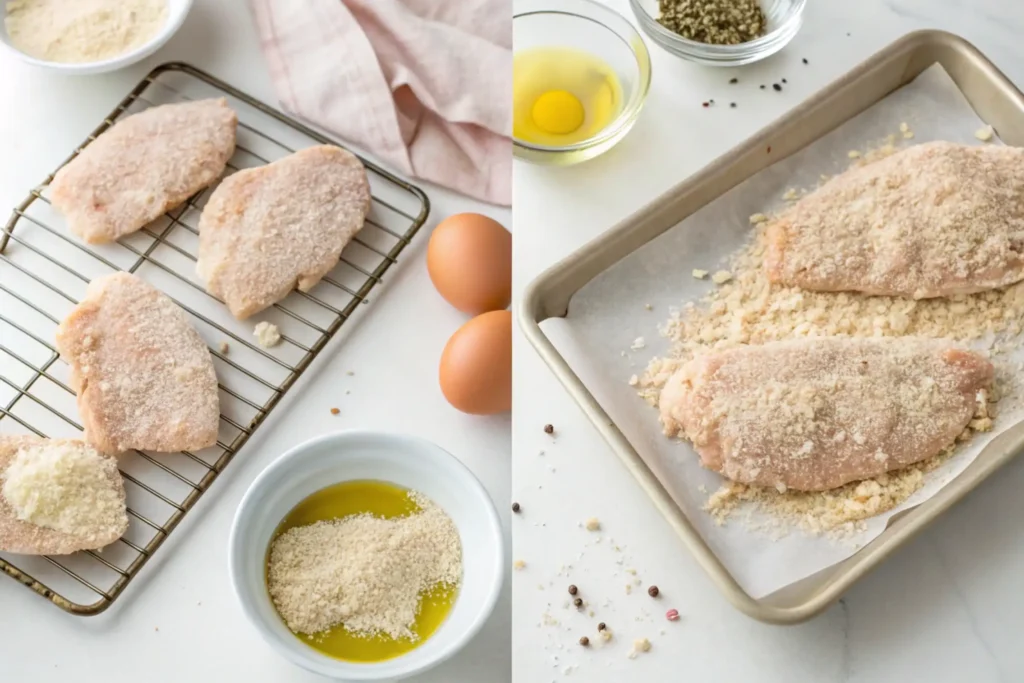
Step 2: Prepare the Breading Station
Set up a breading station with three shallow bowls:
- Bowl 1: Crack the eggs into the bowl and beat them lightly. This will help the breadcrumbs stick to the chicken.
- Bowl 2: Pour your breadcrumbs into the second bowl. You can mix in some grated Parmesan or your choice of herbs here for extra flavor.
- Bowl 3: Optionally, add some seasoning to the breadcrumbs, such as salt, pepper, garlic powder, and any other herbs you like.
Step 3: Coat the Chicken
Dip each piece of chicken into the egg mixture first, ensuring it’s fully coated. Then, transfer it into the breadcrumb mixture, pressing lightly to make sure the breadcrumbs adhere. Make sure the chicken is well-coated but not overly thick with breadcrumbs.
Step 4: Arrange the Chicken on a Baking Sheet
Place a baking rack on a baking sheet. The rack allows air to circulate around the chicken, resulting in even crispiness. If you don’t have a rack, just place the chicken directly on a lightly greased baking sheet. For a crispier finish, drizzle a small amount of olive oil over the top of each cutlet.
Step 5: Bake the Cutlets
Preheat your oven to 400°F (200°C). Place the prepared chicken cutlets on the rack and bake for about 15-20 minutes. The exact cooking time depends on the thickness of your chicken. To check for doneness, the internal temperature should reach 165°F (75°C).
Step 6: Serve and Enjoy
Once your baked chicken cutlets are perfectly golden and crispy, remove them from the oven and let them rest for a couple of minutes. This helps the juices redistribute and keeps the chicken moist. Serve immediately with your favorite side dishes, and enjoy!
2.3 Tips for Perfectly Baked Chicken Cutlets
Here are some extra tips and tricks to make sure your baked chicken cutlets turn out crispy, juicy, and packed with flavor:
- Don’t Overcrowd the Baking Sheet: Space the chicken cutlets out on the rack or baking sheet to allow for proper air circulation. This helps the cutlets bake evenly and prevents them from becoming soggy.
- Use a Meat Thermometer: While you can visually check the cutlets, using a meat thermometer ensures they’re cooked perfectly. Aim for 165°F (75°C) in the thickest part of the cutlet.
- Customize the Breading: Experiment with different breading mixtures. Add some crushed cornflakes, ground almonds, or even coconut flakes for a unique flavor and texture.
- Try a Double Breading Technique: For an extra-crispy finish, dip the chicken back into the egg mixture and breadcrumbs for a second coat before baking. It’s not necessary but adds a nice crunch!
- Avoid Overcooking: Overcooked chicken can become dry, so keep an eye on the cutlets as they bake. Checking the internal temperature is the best way to avoid this.
With these tips, you’re now ready to create perfectly crispy and juicy baked chicken cutlets. In the next section, we’ll explore some exciting variations and flavor options you can experiment with to make your chicken cutlets even more delicious.
Part 3: Variations and Flavor Options for Baked Chicken Cutlets
Once you’ve mastered the basic method for making baked chicken cutlets, the fun really begins! There are countless ways to flavor and customize your cutlets to suit your taste or dietary preferences. Whether you’re in the mood for something savory, spicy, or even cheesy, we’ve got you covered. Let’s explore some exciting variations and flavor options for baked chicken cutlets that will take your meal to the next level.
3.1 Seasoning and Marinades for Baked Chicken Cutlets
While the basic breading of baked chicken cutlets is tasty on its own, you can get creative by adding various seasonings and marinades to elevate the flavors. Here are a few ideas to spice up your cutlets:
Simple Seasoning Combinations
Sometimes, a few basic seasonings are all you need to create a flavorful baked chicken cutlet. Here’s a simple seasoning mix that works every time:
- Salt and pepper (for the perfect balance)
- Garlic powder (adds that savory depth)
- Onion powder (for a hint of sweetness)
- Dried oregano or thyme (to bring in some earthy herb flavors)
Mix these together in your breadcrumb coating or season the chicken directly before breading for a quick and easy option.
Zesty Lemon Herb Marinade
A lemon herb marinade can add a bright, fresh flavor to your baked chicken cutlets. Combine:
- Lemon juice and zest
- Olive oil
- Fresh herbs (like rosemary, thyme, or parsley)
- Garlic cloves, minced
- Salt and pepper
Let the chicken marinate in this mixture for 30 minutes to an hour before breading and baking. The lemon will tenderize the chicken while infusing it with a delicious, zesty flavor.
Spicy Cajun or BBQ Marinade
If you’re in the mood for a bit of heat, a spicy Cajun or BBQ marinade can add the perfect kick. For Cajun seasoning, combine:
- Paprika
- Cayenne pepper
- Garlic powder
- Onion powder
- Oregano
For a BBQ marinade, mix:
- Your favorite BBQ sauce
- A splash of apple cider vinegar
- A bit of smoked paprika
Marinate the chicken for at least 30 minutes before baking for a juicy, flavorful cutlet with a bold taste.
3.2 Healthy Add-ins and Toppings
Want to get a little fancier with your baked chicken cutlets? Here are some healthy add-ins and toppings that not only boost flavor but also add nutritional value:
Vegetable Add-ins
You can sneak in some extra veggies by adding them to the breading mix or even using them as a topping. Consider:
- Spinach: Finely chopped spinach mixed into the breadcrumbs will add a pop of color and a dose of vitamins.
- Zucchini: Grated zucchini can be added to the breading for extra moisture and nutrients.
- Cauliflower Rice: Mix some cauliflower rice into the breadcrumbs for added texture and a lower-carb option.
Cheese Variations
For cheese lovers, adding cheese to your baked chicken cutlets can make them even more irresistible:
- Parmesan cheese is a classic choice, adding a salty, nutty flavor that pairs perfectly with the crispy cutlets.
- Mozzarella cheese gives a melty, gooey texture when added on top of the cutlet during the last few minutes of baking.
- Cheddar cheese can add a sharp, creamy layer of flavor if mixed into the breadcrumbs or sprinkled on top before baking.
Herb Blends
Fresh herbs can completely change the flavor of your baked chicken cutlets. Some great options include:
- Fresh basil, oregano, and thyme for a Mediterranean twist.
- A sprinkle of parsley after baking for a fresh, herby touch.
3.3 Pairing Baked Chicken Cutlets with Side Dishes
Now that you’ve got your baked chicken cutlets ready to go, it’s time to think about what to serve alongside them. The beauty of baked chicken cutlets is that they pair well with almost anything! Here are a few ideas for sides that will complement your meal perfectly:
Healthy Sides
- Steamed Vegetables: Broccoli, asparagus, or green beans are simple yet nutritious options that pair beautifully with the crispy chicken. Season them lightly with olive oil, lemon, and garlic for an added burst of flavor.
- Salads: A fresh, crisp salad made with mixed greens, tomatoes, cucumbers, and a light vinaigrette offers a refreshing contrast to the rich, savory cutlets.
Carb-Rich Sides
- Roasted Potatoes: These are a classic pairing with any chicken dish. Roasted baby potatoes with rosemary, olive oil, and garlic bring out rich flavors and textures that match well with the cutlets.
- Rice: Whether it’s brown rice, jasmine, or a flavorful herb-infused rice, the light fluffiness of rice is a perfect match for baked chicken cutlets.
Sauces and Dips
- Tomato Sauce: A simple marinara or roasted tomato sauce can bring a tangy, flavorful contrast to the crispy chicken. Perfect if you’re craving a bit of Italian flair!
- Mustard Dipping Sauce: For a tangy twist, mix Dijon mustard with a little honey or yogurt. This creates a creamy, slightly sweet dip that’s a hit with baked chicken.
- Creamy Yogurt Sauce: A cooling yogurt-based dip with a touch of lemon and garlic is another great option that complements the cutlets’ crispiness.
FAQs
Q1: Is it better to bake chicken at 350 or 400 in the oven?
A: It’s generally better to bake chicken at 400°F, especially for baked chicken cutlets. Baking at this higher temperature helps achieve a crisp, golden crust while keeping the chicken juicy inside. If you bake at 350°F, it can take longer and may not get as crispy. However, 350°F is still an option for a more gentle cook, particularly if you’re cooking thicker pieces of chicken.
Q2: How long does it take to bake thin chicken breasts at 400?
A: When baking thin chicken breasts at 400°F, they typically take between 15-20 minutes. The exact time will depend on the thickness of the chicken, but they should reach an internal temperature of 165°F (75°C) to be fully cooked. For best results, use a meat thermometer to check for doneness and avoid overcooking.
Q3: How long to cook thin chicken breasts at 350 degrees?
A: When baking thin chicken breasts at 350°F, they generally take around 25-30 minutes. Since the oven temperature is lower, the cooking time increases. Always check for an internal temperature of 165°F (75°C) to ensure the chicken is safe to eat.
Q4: How do you keep breading from falling off chicken cutlets?
A: To prevent breading from falling off chicken cutlets, make sure to thoroughly coat the chicken in the egg wash before dipping it in breadcrumbs. Press the breadcrumbs onto the chicken firmly to ensure they adhere well. Additionally, letting the breaded chicken rest for a few minutes before baking helps the breading set. If needed, lightly spray or drizzle some oil over the cutlets before baking to ensure they stay crispy.
Conclusion
Baked chicken cutlets are an incredibly versatile, flavorful, and healthy option for any meal. Whether you’re cooking for your family or preparing a quick dinner for yourself, these crispy, tender cutlets provide the perfect balance of protein and flavor. With a few simple ingredients and a little creativity, you can customize your cutlets to fit any taste, from zesty lemon herb to spicy Cajun, or even cheesy Parmesan. Plus, by following the tips and tricks we’ve shared, you can ensure that your cutlets come out perfectly every time—crispy on the outside, juicy on the inside.
The best part? Baked chicken cutlets are quick, easy to prepare, and pair well with a variety of sides, making them ideal for busy weeknights or meal prep. With all the variations and healthy additions you can try, there’s no end to the delicious possibilities. So, get in the kitchen, fire up your oven, and enjoy a tasty and nutritious meal that everyone will love!

